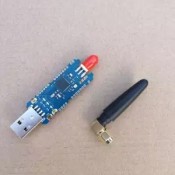
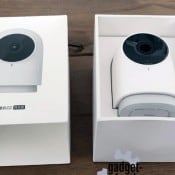
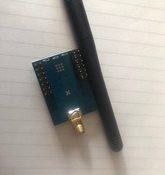
Our Zigbee articles:

nr 1 Zigbee Buying Guide: The best one for starting with Zigbee!

0

Welcome to the zigbee buying guide, because Zigbee is hot!! It has a low battery consumption, a mesh network with a great range to connect many of the wireless devices in your home. Yes, all those things do also apply to the Z-wave protocol, but because producers don’t need to buy expensive licences the Zigbee products are usually much cheaper. And more brands have adopted the Zigbee protocol for their products. Everyone starting with home automation, eventually have to choose for a single protocol for their devices, so they don’t end up with multiple gateways. So it is important to choose a protocol that is so popular, well maintained and has supported products which are widely available. We wrote some articles on Zigbee2mqtt, but on this zigbee buying guide, we show several options to help to get you started with Zigbee.
Zigbee Buying Guide

What is Zigbee?

ZigBee is an open standard protocol for wireless connections between devices at short distances. It is used for the transmission of sensor data and process monitoring & control. Examples are the health of a patient or the monitoring of indoor safety with the help of sensors. A ZigBee connection is very robust, but the bandwidth and the transmission speed are limited compared to Bluetooth and Wi-Fi. Zigbee is designed for home automation applications. For example to remotely control dimmers and on/off switches of the lighting in a home or building with minimal means.

If you want to know more about the Zigbee protocol, the Wikipedia page and the official Zigbee site are great places to start.

Zigbee buying guide

To get started with Zigbee you need to have a gateway, but which options are available?
We defined them in three categories:

  • Plug and Play solutions, like Philips Hue, ikea Tradfri and Xiaomi (Expensive, cheaper, cheapest).
  • Almost Plug and Play solutions.
  • Totally Do It Yourself (DIY): building your own Zigbee2MQTT gateway.

Every company and brand does the same, protecting their ecosystem! Supporting only their own devices, although the understanding of open systems is more and more accepted it will always be so. With hue it’s possible to add cheaper Ikea bulbs but you cannot add Xiaomi sensors to it. Every brand has his own strength: A good app, affordable sensors, fast development, good quality lights. But not one company is succeeding to combe them.

Although Xiaomi is coming close, for exemple lots of different devices, a good app and a very good price, the only downside is the internet calls to China.
And our goal is still one app to control it all. Domoticz or Home Assistant instead of different apps on your cell phone. One software system, but also less hardware (like several bridges or gateways). On this page we show several options to use Zigbee in your house. All options are compatible with Domoticz and Home-Assistant.

Plug and Play Solutions:

We call it plug and play, but what we mean is a gateway with software that is usable out of the box. With lights or sensors from the same brand.
There are several options in this category, and the most popular and one of the first is: Philips Hue. Ikea is more affordable with his Tradfri system which is a younger platform. A name that became really popular quite fast is Xiaomi. Xiaomi has the cheapest gateway but by far the most complete ecosystem. Lights, sensors, switches but also home appliances like robot vacuums, ip cameras. All usable from one app: Mi home.

Xiaomi gateways:

Almost Plug and Play Solutions:

Zigate and Deconz are two gateways that try to fill the gap between ‘Plug and Play’ and ‘Do It Yourself’. Both having a USB connecting and aiming to support a great variety of brands and devices.

Zigate

A French guy started his adventure on Kickstarter. He was charmed about the quality and price of Xiaomi products and started developing his own gateway. A ZHAZ and ZZL compatible ZigBee gateway to support multiple brands.
The price is fair, the product looks good but the site and much info is only available in French. The Zigate is available in two versions: a USB Zigbee stick that you have to plug into your Home Automation system (in most cases a Raspberry Pi). The other version is a standalone Wifi version.
Zigate is compatible with both Domoticz and Home Assistant.

More info:

Deconz

The deconz stick is a ZigBee gateway stick from the company Dresden Elektronik. Almost the same principles as the Zigate, an open-source multi-support gateway. Version 1 became quite popular and now there is a newer version: http://phoscon.de/de/conbee2

On their website they link to various home automation projects and they all have a plugin / addon / component or other ways to integrate the Deconz stick.
The stick costs about 40 Euro and are available in a few different countries.

I think the documentation about how to install and integrate is one of the key features!

More info:

DIY Zigbee gateway: Zigbee2mqtt

We wrote a lot about Zigbee2MQTT. Why? because it’s cheap, easy to setup and fun! However it’s ‘Do It Yourself’. The documentation and possibilities are so clear and well documented, that it’s easy to start with, even if you are not a techie. And when you’re done and using it, it gives you a good understanding of how it works.

Like Zigate and Deconz the communities isoke, goal is to be open-source, No cloud (china calls) needed. But the Zigbee2MQTT approach is the cheapest and it is the most rewarding experience.

Our articles about zigbee2mqtt:

Zigbee buying guide: One DIY Zigbee2mqtt Gateway to rule them all.
One DIY Zigbee Gateway to rule them all.

Affordable Xiaomi Zigbee devices

Xiaomi Gateway 3: Highly hackable! Pair unsupported Zigbee & Bluetooth devices and get them into Home-Assistant!

Great news! The old gateway is became very popular because of the default integrations into Home Assistant and Domoticz. The Gateway 3 is more powerful, has Zigbee 3 and has a bluetooth BLE chip on-board. Great specs, but the downside is that not every Xiaomi devices is supported yet, and third party devices/brands not at all. But this is changed thanks to AlexxIT. He made it possible to integrate the Xiaomi Gateway 3 into Home Assistant and maybe the best part: He also found a way to pair unsupported devices!

This changes everything! This way the Xiaomi Gateway 3 can be become as popular as the first gateway, and maybe even more popular.

The component works with the ZNDMWG03LM model and firmware versions v1.4.6_0012 and v1.4.6_0030. Before updating make sure that the component works with the newer firmware version!

This article was created in cooperation with AlexxIT, we got his permission to publish this! We hope we can spread the love for Home Assistant and the work of AlexxIT. This article contains affiliate links to banggood and Aliexpress so we can continue this kind of articles.


Control Zigbee devices from Home Assistant with Xiaomi Gateway 3 (ZNDMWG03LM) on original firmware. Xiaomi Gateway 3 Gateway support Zigbee 3Bluetooth Mesh and HomeKit. The method in this article does not change the device firmware. Gateway continues to work with Mi Home and HomeKit!

Important: This component does not work with:

  • Xiaomi Gateway 2 (DGNWG02LM, lumi.gateway.v3) – use this component
  • Xiaomi Gateway EU (DGNWG05LM, lumi.gateway.mieu01)

Gateway 3 is hackable!

Unlike all other gateways, the updated version has a unique feature: you can programmatically open Telnet access on it. Access opens only if you have a Mi Home token, so everything is completely secure.
This gateway contains an EFR32 series chip from Silicon Labs. Those, in turn, supply an SDK with the chip. The SDK includes an MQTT transport that provides access to the Zigbee puncture from any software installed both on the gateway and outside of it.

By default, the MQTT broker is not accessible from the outside, but we now have Telnet!

The broker has two root topics: raw Zigbee data and processed data from Xiaomi. I decided to take the processed data as a basis. There device attributes, although described by pseudocodes, are still easier to understand for a person who does not understand anything in Zigbee.

As a result, we got such a component for Home Assistant – XiaomiGateway3. It automatically enables Telnet and public MQTT using the Mi Home token.

AlexxIT, Who is he?

This article is with permissions from Alexx. A Russian developer who deserves all the credits for his hard work!

Future plans

  • In the future, AlexxIT is planning to add receiving a token from Xiaomi servers using a Mi Home account. After all, recently a working implementation of authorization in their cloud appeared on the network .
  • It is necessary to debug the operation of the hub with the entire list of officially supported Zigbee devices. Add the ability to customize “fine” parameters:
    • hub settings: for example, power (and it can be greatly increased!),
    • changing the settings of child devices: the mode of logical buttons on switches, the sensitivity of the vibration sensor and much more.
  • Adding cloud support to get a hub token and a complete list of Zigbee and Bluetooth devices.
  • Adding support for Bluetooth Mesh lamps.

And the most important thing is to add support for devices from other manufacturers. Yes it is possible. AlexxIT is able to connect and manage all the third-party devices that he had. Such devices do not appear in Mi Home and HomeKit. But they can be controlled using raw Zigbee commands (from Home Assistant).

Almost every device requires its own handler. In the case of Xiaomi Gateway 3 and officially supported devices, the role of such a handler is played by a software hub. We hope he gets help by donations, devices, and logs&debugs to continue his work!

Why integrate the Xiaomi Gateway 3 into home Assistant?

Because it’s possible! Control everything from one platform, one system to rule them all. And get rid of the dependency of the Xiaomi cloud!

How it works?

The component enables Telnet on Gateway via Miio protocol. Only this Gateway supports this command. Do not try to execute it on other Xiaomi/Aqara Gateways.

The component starts the MQTT Server on the public port of the Gateway. All the logic in the Gateway runs on top of the built-in MQTT Server. By default, access to it is closed from the outside.

ATTENTION: Telnet and MQTT work without a password! Do not use this method on public networks.

After rebooting the device, all changes will be reset. The component will launch Telnet and public MQTT every time it detects that they are disabled.

Supported Zigbee Devices

Currently supported, but not tested other Xiaomi and Aqara Zibee devices officially supported by the Gateway. This list will growing fast, now AlexxIT knows how to support other devices. He has also plans to support for Zigbee devices from other manufacturers. And will try to support ZHA.

Namemodelpicturebangood / gearbest
Aqara Bulb (ZNLDP12LM)ZNLDP12LMAQara Smart LED Bulb E27 LED Light Timing Remote Control Voice Control Work With MijiaBanggood
Aqara Button (WXKG11LM)WXKG11LMAqara Smart Wireless Switch Smart Remote One Key Control Intelligent Application Home Security APP ControlBanggood
Aqara Cube (MFKZQ01LM)MFKZQ01LMAqara Magic Cube Controller Zigbee Version Upgrade Gateway Smart Home Device Wireless Support MiHome APPBanggood
Aqara Curtain (ZNCLDJ11LM)ZNCLDJ11LMAqara Smart Curtain Zigbee Motor Aqara Home APP Remote Control Wireless Timing Control need WorkBanggood
Aqara Door Sensor (MCCGQ11LM)MCCGQ11LMAqara Door Window Sensor Zigbee Wireless Connection Smart Mini Door Window Burglar Alarm Work WithBanggood
Aqara Double Wall Button (WXKG02LM)WXKG02LMAQara font b WXKG02LM b font Smart Light Switch Wireless Version Double Key International EditionBanggood
Aqara Motion Sensor (RTCGQ11LM)RTCGQ11LMAqara Human Body Sensor Smart Body Induction Movement Motion Sensor Zigbee Connection work with MiBanggood
Aqara Opple Six Button (WXCJKG13LM)WXCJKG13LMXiaomi Aqara OPPLE font b WXCJKG13LM b font ZigBee Wireless Smart Switch Home Bedroom LightingBanggood
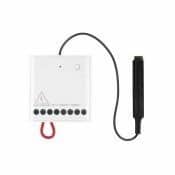
Aqara Relay (LLKZMK11LM)LLKZMK11LMNew Aqara Two way Module Control Double Channels AC Motor Wireless Controller For SmartBanggood
Aqara Roller Shade (ZNGZDJ11LM)ZNGZDJ11LMAqara Rolling Shutter Motor Smart Curtain Motor Intelligent Timing Setting ZiGBee Mi Home Smartphone APPBanggood
Aqara Socket (QBCZ11LM)QBCZ11LMAqara Smart Wall Socket ZigBee Wifi Remotel Control Wireless Switch Work For Mi Smart HomeBanggood
Aqara Vibration Sensor (DJT11LM)DJT11LMAqara Vibration Sensor Zigbee Smart Devices Gyro Movement Wireless Automation Security Remote Notification Work withBanggood
Aqara Wall Double Switch (QBKG03LM)QBKG03LMAqara Smart Home Switch Light Remote Control ZiGBee wifi Wireless Key Wall Live Wire SwitchBanggood
Aqara Water Leak Sensor (SJCGQ11LM)SJCGQ11LMAqara Water Immersing Sensor Flood Water Leak Detector For Home Remote Alarm Security SoakingBanggood
IKEA Bulb E14  
Xiaomi Button (WXKG01LM)WXKG01LMXiaomi Mijia Smart Wireless Switch Smart Home Device Accessories House Control Center Intelligent for MihomeBanggood
Xiaomi Door Sensor (MCCGQ01LM)MCCGQ01LMSmart Door Window Sensor Smart Home Kits Remote alarm for Mihome app zigbee wifi versionBanggood
Xiaomi Light Sensor (GZCGQ01LM)GZCGQ01LMOriginal Xiaomi Mijia Light Sensor Intensity 0 83000Lux Precise Large Range Linked Automation Life WaterproofBanggood
Xiaomi Motion Sensor (RTCGQ01LM)RTCGQ01LMXiaomi Mijia Human Body Sensor ZigBee Wireless Connection 7m Detection Work With Mijia 
Xiaomi Plug (ZNCZ02LM)ZNCZ02LMXiaomi smart Plug mijia Smart Socket ZigBee Wifi Version Phone Remote Control Timer Power Detection 
Xiaomi Plug EU (ZNCZ04LM)ZNCZ04LMXiaomi Mijia EU Smart Socket WiFi Zigbee Remote Control Time Switch Power saving Works with 
Xiaomi TH Sensor (WSDCGQ01LM)WSDCGQ01LMOriginal Xiaomi Mi Smart Temperature and Humidity Sensor ZigBee Wireless For Xiaomi Smart Home Mijia

Supported BLE Devices

Namemodelpicturebangood link
Aqara N100 Smart Door LockNew font b Aqara b font font b N100 b font font b Smart bBanggood
Xiaomi Door Sensor 2 (MCCGQ02HL)MCCGQ02HLXiaomi Smart Door Window Sensor 2 BlueTooth 5 1 Light Detection Opening Closing Records Unclosed 
Xiaomi Flower Monitor (HHCCJCY01)HHCCJCY01New font b Xiaomi b font Mi Flora font b Monitor b font Digital PlantsBanggood
Xiaomi TH Sensor (LYWSD03MMC)LYWSD03MMCXIAOMI Thermometer Mijia Bluetooth 2 Digital Temperature Humidity Monitor Smart Electric Digital Hygrometer
Xiaomi Rubik’s Cube (XMMF01JQD) – don’t sends edge info, only direction!XMMF01JQDOriginal Xiaomi Smart Magic Cube Bluetooth 5 0 Six axis sensor APP 3D dynamic tutorial 
Xiaomi TH Sensor (LYWSD03MMC)LYWSD03MMCXIAOMI Thermometer Mijia Bluetooth 2 Digital Temperature Humidity Monitor Smart Electric Digital Hygrometer 
Xiaomi TH Sensor (LYWSDCGQ/01ZM)LYWSDCGQ/01ZMXIAOMI MIJIA Bluetooth Thermometer Hygrometer Smart Humidity Sensor Moisture Meter LCD Screen Digital Thermometer Mihome 
Xiaomi TH Watch (LYWSD02MMC)LYWSD02MMCWatch temperature and humidity sensor Xiaomi MiJia temperature and humidity electronic

Demo video:

Currently supported, but not tested, other Xiaomi BLE devices officially supported by the Gateway with these attributes:

temperature, humidity, motion, illuminance, moisture, conductivity, formaldehyde, mosquitto, battery

BLE devices and their attributes do not appear immediately! And don’t save their data across HA reboots! Their data is updated only when the device itself sends them. Temperature, humidity and battery may refresh at different times.

Get the Gateway 3 into Home Assistant

Install the XiaomiGateway3 custom component

You can install component with HACS custom repo: AlexxIT/XiaomiGateway3
Or manually copy xiaomi_gateway3 folder from latest release from github to custom_components folder in your config folder.

Config Xiaomi Gateway 3

Before you can configure the component you need to obtain the Mi Home token and know the IP adress from your gateway.
Give the gateway a fixed static IP address in you router. Getting the Token of the Xiaomi Gateway 3 can be done with several methods: This article shows all methos to obtain Mi Home token. I am using the method with Mi Home v5.4.54 for non-rooted Android. If you don’t have an Android – you can install the emulator on Windows.

Continue if you have the ip address and Mi Token

With GUI. Configuration > Integration > Xiaomi Gateway 3. And enter Gateway IP address and Mi Home token.

Advanced config

Support custom occupancy timeout for motion sensor. Default 90 seconds.

xiaomi_gateway3:
  devices:
    '0x158d00044c5dff':
      occupancy_timeout: 90  # (optional) default 90 seconds

Add and remove Zigbee devices

To enter the pairing mode, turn on the switch Xiaomi Gateway 3 Pair. Pairing lasts 60 seconds. After successfully adding the device, the Gateway will sound two long beeps. If the addition was unsuccessful, for example, an unsupported device, the Gateway will sound three short beeps. To delete a device from Hass and from Gateway – you need to rename device to delete. Just the device, not its objects!

Add third-party Zigbee devices

Video Demo:

Control non Xiaomi zigbee devices from Xiaomi Gateway 3

Attention 1: Only devices similar to Xiaomi devices will work!

Attention 2: After the first pairing, Mi Home remembers the selected device model. And with the next pairings, it will show old interface, even if you change the model. Hass will take the new device model on the next pairings.

To add a custom device, you need to call the service remote.send_command with params:

entity_id: remote.0x680ae2fffe123456_pair  # change to your Gateway remote
command: pair
device: ikea.light.led1623g12  # change to your device model

You need to choose the most similar Xiaomi model for your device from this file.

For example, for a lamp or dimmer – choose an IKEA lamp ikea.light.led1623g12.

Sometimes it doesn’t work the first time and you need to try pairing again.

The devices added in this way will work even after the Gateway is restarted. They will continue to work without Hass. And they can be used in Mi Home automations.

You can discuss the feature here.

Zigbee Home Automation Mode

Video Demo

Zigbee Home Automation (ZHA) with Xiaomi Gateway 3 on original firmware without soldering

Zigbee Home Automation (ZHA) is a standard Home Assistant component for managing Zigbee devices. It works with various radio modules such as CC2531, Conbee II, Tasmoted Sonoff ZBBridge and others.

Important: ZHA component is in early development stage. Don’t expect it to work well with all devices.

Attention: ZHA mode cannot work simultaneously with Mi Home!

When you turn on ZHA mode – zigbee devices in Mi Home will stop working. Bluetooth devices will continue to work.

To switch the mode – delete the old integration and configure the new one in a different mode. Zigbee devices will not migrate from Mi Home to ZHA. You will need to pair them again with ZHA.

You can change the operating mode at any time. Just remove the old integration and set up the new one. Your gateway firmware does not change! Just reboot the gateway and it is back in stock.

When switching from ZHA to Mi Home mode – restart the gateway. When switching from Mi Home to ZHA – no reboot required.

Handle Button Actions

Handling Zigbee buttons with Xiaomi Gateway 3 in Home Assistant

Buttons, vibration sensor, cube, locks and other – create an action entity. The entity changes its state for a split second and returns to an empty state. The attributes contain useful data, they are not cleared after the event is triggered.

automation:
- alias: Turn off all lights
  trigger:
  - platform: state
    entity_id: sensor.0x158d0002fa99fd_action
    to: button_1_single
  action:
  - service: light.turn_off
    entity_id: all
  mode: single

Handle BLE Locks

bluetooth lock

BLE locks have an action entity, just like buttons.
The state changes to doorlockfingerprint, armed when an event occurs. Details of the event are in the entity attributes.

action: fingerprint
key_id – Key ID in full hex format
action_id: 0, message: Match successful
action_id: 1, message: Match failed
action_id: 2, message: Timeout
action_id: 3, message: Low quality
action_id: 4, message: Insufficient area
action_id: 5, message: Skin is too dry
action_id: 5, message: Skin is too wet

action: door
action_id: 0, message: Door is open
action_id: 1, message: Door is closed
action_id: 2, message: Timeout is not closed
action_id: 3, message: Knock on the door
action_id: 4, message: Breaking the door
action_id: 5, message: Door is stuck

action: lock
key_id – Key ID in short decimal format
action_id: 0, message: Unlock outside the door
action_id: 1, message: Lock
action_id: 2, message: Turn on anti-lock
action_id: 3, message: Turn off anti-lock
action_id: 4, message: Unlock inside the door
action_id: 5, message: Lock inside the door
action_id: 6, message: Turn on child lock
action_id: 7, message: Turn off child lock
method_id: 0, method: bluetooth
method_id: 1, method: password
method_id: 2, method: biological
method_id: 3, method: key
method_id: 4, method: turntable
method_id: 5, method: nfc
method_id: 6, method: one-time password
method_id: 7, method: two-step verification
method_id: 8, method: coercion
method_id: 10, method: manual
method_id: 11, method: automatic
key_id: 0xc0de0000, error: Frequent unlocking with incorrect password
key_id: 0xc0de0001, error: Frequent unlocking with wrong fingerprints
key_id: 0xc0de0002, error: Operation timeout (password input timeout)
key_id: 0xc0de0003, error: Lock picking
key_id: 0xc0de0004, error: Reset button is pressed
key_id: 0xc0de0005, error: The wrong key is frequently unlocked
key_id: 0xc0de0006, error: Foreign body in the keyhole
key_id: 0xc0de0007, error: The key has not been taken out
key_id: 0xc0de0008, error: Error NFC frequently unlocks
key_id: 0xc0de0009, error: Timeout is not locked as required
key_id: 0xc0de000a, error: Failure to unlock frequently in multiple ways
key_id: 0xc0de000b, error: Unlocking the face frequently fails
key_id: 0xc0de000c, error: Failure to unlock the vein frequently
key_id: 0xc0de000d, error: Hijacking alarm
key_id: 0xc0de000e, error: Unlock inside the door after arming
key_id: 0xc0de000f, error: Palmprints frequently fail to unlock
key_id: 0xc0de0010, error: The safe was moved
key_id: 0xc0de1000, error: The battery level is less than 10%
key_id: 0xc0de1001, error: The battery is less than 5%
key_id: 0xc0de1002, error: The fingerprint sensor is abnormal
key_id: 0xc0de1003, error: The accessory battery is low
key_id: 0xc0de1004, error: Mechanical failure

Tell AlexxIT if the values are not correct he translated it from the Chinese documentation.

Example of several automations:

automation:
- alias: Doorbell
  trigger:
    platform: state
    entity_id: sensor.ble_1010274797_action
    to: door
  condition:
    condition: template
    value_template: "{{ trigger.to_state.attributes['action_id'] == 3 }}"
  action:
    service: persistent_notification.create
    data_template:
      title: Doorbell
      message: The doorbell is ringing

- alias: Lock Error
  trigger:
    platform: state
    entity_id: sensor.ble_1010274797_action
    to: lock
  condition:
    condition: template
    value_template: "{{ trigger.to_state.attributes['error'] }}"
  action:
    service: persistent_notification.create
    data_template:
      title: Lock ERROR
      message: "{{ trigger.to_state.attributes['error'] }}"

- alias: Open lock
  trigger:
    platform: state
    entity_id: sensor.ble_1010274797_action
    to: lock
  condition:
    condition: template
    value_template: "{{ trigger.to_state.attributes['action_id'] == 0 }}"
  action:
    service: persistent_notification.create
    data_template:
      title: Lock is open
      message: |
        Opening method: {{ trigger.to_state.attributes['method'] }}
        User ID: {{ trigger.to_state.attributes['key_id'] }}

Debug mode the Xiaomi Gateway 3 component

Component support debug mode. Shows only component logs. The link to the logs is always random. Demo video of another component of AlexxIT, but the idea is the same:

Control Sonoff Devices with eWeLink firmware over LAN from Home Assistant

With debug: bluetooth or debug debug: mqtt option you will get advanced log for raw BLE and MQTT data.
With debug: true option you will get usual component logs
xiaomi_gateway3: debug: true # you will get HA notification with a link to the logs page

You can filter data in the logs and enable auto refresh (in seconds).

http://yourip:8123/c4e99cfc-0c83-4a39-b7f0-278b0e719bd1?q=ble_event&r=2

How you can help the xiaomi gateway 3 project

Test, code, post issues and help each other at:
The official github place: https://github.com/AlexxIT/XiaomiGateway3
Home assistant topic: https://community.home-assistant.io/t/xiaomi-mijia-smart-multi-mode-gateway-zndmwg03lm-support/159586
Donate to AlexxIT: https://www.buymeacoffee.com/AlexxIT

Xiaomi Mijia Smart Multi-Mode Gateway 3 (ZNDMWG03LM) Zigbee 3 and BLE
  • Design
    (4.5)
  • Quality
    (4.5)
  • Usability
    (4.5)
  • Home-Automation compatibility
    (4.5)
  • Price
    (5)
4.6

Summary

An affordable price for such a good product. It’s a shame that not all the devices that were compatible with the previous gateway are not included in the new one yet. Technical it’s possible to add various third party zigbee devices, but with a custom component from a open-source home assistant project. Xiaomi had made this possible by default, that would be great!

Pros

  • Zigbee 3
  • Bluetooth BLE
  • Homekit compatible
  • Affordable
  • USB charger
  • EU version
  • Still hackable

Cons

  • No LED light
  • External devices are not compatible right out of the box
  • Not all xiaomi devices are yet available

Where to buy the Xiaomi Gateway 3?

Zigbee2mqtt as alternative

This is the start of something beautiful! It would become easier and more devices become supported, but we can’t tell how long it takes on forehand. An alternative is the Zigbee2mqtt project, a huge list of already supported devices, software that is growed mature and a great community. The Price of the xiaomi gateway is almost the same. Check our zigbee articles about zigbee2mqtt.

zigbee2mqtt, the best for Home Automation.
https://gadget-freakz.com/tag/zigbee/

Best Xiaomi Mijia Smart Multi-Mode Gateway 3 (ZNDMWG03LM) Zigbee 3 and BLE review

Before we start to discuss the Xiaomi Mijia Smart Multi-Mode Gateway 3 (ZNDMWG03LM), let’s first briefly talk about what made the previous versions special. First, the most obvious thing: the Xiaomi gateway started a Zigbee revolution. A few reasons for the the popularity:

  • Xiaomi was one of the first that offered a whole range of Zigbee devices that were compatible with their own gateway.
  • All Xiaomi products are very affordable, well designed and good looking.
  • Most of the products were and are compatible with projects as zigbee2mqtt.
  • Xiaomi Gateway 2 (DGNWG02LM, lumi.gateway.v3)* has a “developer mode” on board, which opens a local access protocol to control Zigbee devices of this gateway. There are integrations of this protocol in many open source smart home systems, for example Domoticz and Home Assistant.

The first gateway only supported the Zigbee protocol. In this article we talk about the Xiaomi Mijia Smart Multi-Mode Gateway 3 (ZNDMWG03LM). This gateway supports Zigbee 3Bluetooth Mesh and HomeKit. However, it is still offered at a affordable price. Let’s find out the differences with the previous versions and if it’s worth the money for upgrading or buying it as your first gateway.

*The Euro version of this Xiaomi Gateway EU (DGNWG05LM, lumi.gateway.mieu01), as well as the updated version of Xiaomi Gateway 3 (ZNDMWG03LM, lumi.gateway.mgl03) does not have this protocol.

Gateway version 3

The updated version of the gateway has a new chip with Zigbee 3 (EFR32MG1B), as well as support for Bluetooth Mesh and HomeKit technology. Not all devices are supported in HomeKit yet. But there is a solution to add all kind of third party Zigbee devices through a Home Assistant plugin that is in development.

Features and specs of the Xiaomi Gateway 3

Gateway support Zigbee 3Bluetooth Mesh and HomeKit.

BrandXIAOMI Mijia
ModelZNDMWG03LM
Material ABS
Color White
Weight 100g
Size 90 x 25mm
Input5V / 1A
Working Humidity0% ~ 95%RH
Support SystemAndroid 5.0 Or IOS 12.0 Or Above
Working Temperature-5℃ ~ 50℃
Compatible ProtocolZigBee2.0/3.0,WIFI, Bluetooth & Bluetooth Mesh
Number of Sub-devices32
Signal Distance   About 200m(Open area)

Design

The gateway 3 have Apple looks like you expect from Xiaomi. The USB charger is very small but a design choice to choose micro USB instead of USB 3c has something to do with the costs I think.

Package

Package Included:
1 x Xiaomi Multimode ZigBee 3.0 WIFI Bluetooth Mesh HomeKit Smart Home Gateway
1 x Power Cable
1 x User manual

Xiaomi Gateway vs version 3


In the table below we tried to show the main differences between the old and the new Xiaomi Gateway.

GatewayGateway v3
Led light ring
Button to turn on/off alarmsButton to turn on/off alarms
Directly into power socketUsb charger as adapter, with micro USB port
ZigbeeZigbee 3
WifiWIFI
Bluetooth mesh (BLE)
Comparison table between two Xiaomi gateways

Xiaomi Gateway 3 software

This gateway is still compatible with the Mi Home app and can be added even if you already have an (first edition) gateway.

Xiaomi Gateway 3 (ZNDMWG03LM) compatible with Home Assistant

But we from gadget-freakz are more interested in the possibilities to integrate Xiaomi Gateway 3 (ZNDMWG03LM, lumi.gateway.mgl03) into our own favorite platform: Home Assistant. Integration of the old gateways was easy: retrieve Mi Home token, add IP of gateway and enter the token. This newer gateway works different. You still can retrieve your token.
But it will not be added automatically added in Home Assistant. Therefor you need an custom component.

Read our article about the custom component to integrate into Home Assistant and Pair unsupported devices.https://gadget-freakz.com/xiaomi-gateway-3-highly-hackable/

Is the ZNDMWG03LM Worth your money?

First of all, it’s affordable with an price around 20~25 euro at Banggood. If you are not a tech savvy person and want something that works out of the box with the compatible of most of the Xiaomi devices, buy it! When having lots of different Zigbee brands and devices, you can take a look at the custom component to get those items working (no warranties all devices will be working). But if you want to be sure almost every Zigbee device will work, and you prefer Home Assistant it’s worth checking the Zigbee2mqtt method with one of the products below:

Where to buy?

Alfawise Z1 Zigbee Smart Home Security Kit

Neat! Time to review a Zigbee security kit that potentially compete with the Xiaomi Aqara smart home solutions. The Alfawise Z1: marketed as a Tuya powered smart home security kit. Talking about marketing: some manufacturers reuse the codes they use for their products. For example Fiat relaunched their 500 model after 50 years. But Alfawise does it differently: They have a Hologram Advertising Display and an Android TV Box both named the Z1. And now they released Alfawise Z1 Zigbee Smart Home Security Kit. Is this Tuya compatible Security Kit, regardless of this lack of product management of Alfawise, worth your money? And when looking further: is it a good way to get yourself or someone else started with Zigbee?

Specifications

The specification as can be found on Gearbest:

Specifications

  • Platform: Tuya
  • App: Smart Life (Android/iOS)
  • Operating temperature: – 10 ℃ ~ + 40 ℃
  • Operating humidity: Maximum 95% RH
  • Zigbee protocol: IEEE802.15.4
  • Zigbee wireless transmission distance: 90 meters.
  • Sensor power supply: 3V/CR2 lithium battery (3+ year life)

Wi-Fi/Zigbee Smart Gateway (ZB01)
Power supply: EU Plug / Input: AC90 ~ 250V / WiFi: IEEE802.11 BGN / Wi-Fi wireless transmission distance: 50 meters (open area) / Sub-devices: up to 32 pcs /
Product size :57 x 57 x 22mm

Zigbee Smart Door Window Magnetic Sensor (D02)
Detecting distance: 15 mm / Support Amazon Alexa smart speaker voice query door and window magnetic switch state. / Supports linkage with other “Tuya” smart home devices, such as automatically turning on the light after opening the door.
Product Size: Master:65 x 28 x 18mm, Slave:30 x 16 x 12.5mm

Zigbee Human Body Sensor (M02)
Detecting range: 5 meters or less / Viewing angel: 120 degrees / Installation height: 1.2 ~ 2.1 meters /
Product size: 46 x 38 x 35 mm

Zigbee Temperature Humidity Sensor (T02)
Measure temperature range: -20°C ~ +60°C, ±2 °C / Measure humidity range: 0 ~ 100RH, ±5%RH /
Support for Amazon Alexa smart speaker voice query temperature and humidity. /
Supports linkage with other “Tuya” smart home devices, such as automatically turning on air conditioning when the temperature is too high.
Product size: 42 x 40 x 23.5 mm

Expectations

Alfawise is the budget oriented brand that you will mostly find on Gearbest. Our experiences with the brand are mainly positive. As told in the introduction, they have a distinctive basic product coding system where the A8 is a TV Box and the S60 is a windows cleaning robot, and now the Z1 is an Android TV Box, Advertising Display and now a Zigbee Smart Home Security Kit. Most of the Alfawise products are decent and good value for money, and some of them are even very good, but sometimes Alfawise just misses the mark. We hope the Alfawise Z1 (the Zigbee Security Kit) is another great product.

Packaging

The Z1 is shipped in a white retail carton box with printed English text on in. In these box you will find the gateway and sensors packed separately. Each inner box clearly states what product is in it and also contains extra information like a QR code linking to the Smart Life app.

What’s in the box

The contents of the Alfawise Z1 Smart Home Security Kit:

  • ZigBee Gateway,
  • Door and Window Sensor,
  • Temperature and Humidity Sensor
  • Body Sensor

All sensors come with a 3V/CR2 battery, an adhesive strip to mount them on a surface and an English manual.

Features

The main features of the Alfawise Z1 Kit as stated on Gearbest:

  • High precision and high sensitivity
  • Long transmission distance
  • Remotely monitor by mobile phone APP
  • Support smart devices linkage
  • Supports Amazon Alexa voice speaker
  • Long battery life while low power consumption

Build Quality & Design

Both the gateway as the sensors have a similar build quality as both the Xiaomi Aqara gateway and the similar Aqara sensors. In my opinion the Alfawise gateway looks even better than the Xiaomi version, because of its smaller size and simpler appearance. On, the other hand: the Xiaomi Aqara gateway has some additional features like a builtin speaker. But to keep the focus on the Z1 kit: quality is good and design is decent.

Heath / Power consumption /Noise

We haven’t been able to test the marketed battery life of each sensor. Alfawise claims the 3V/CR2 lithium battery will last more than three years in each sensor and this is definitely possible for a Zigbee sensor. What is more relevant is the fact that these sensors share information about their battery status with the Zigbee gateway. So you can check the battery status in the app, and even let them warn you when the battery level is low.

Getting Started with the Alfawise Z1 Kit

The Alfawise Z1 Zigbee Smart Home Security Kit consists of the gateway, Smart door and window magnetic sensor, human sensor and temperature and humidity sensor. Installation of the sensors is pretty simple: you use the adhesive strip to mount them on the surface you want to stick them to. Because you need to link them individually to the gateway, we recommend to first setup the app and the gateway.

The Tuya Smart Life App

The gateway runs on the Smart Life app from the Tuya platform. Alfawise decided to use this platform and that’s a great advantage, because the app is decent and it supports an increasing number of smart devices. We already wrote an article on the Tuya platform and it’s advantages. You need to register an account to be able to use the Smart Life app. As you may know, we are not a big fan of that. But since the Tuya platform supports many Zigbee devices, it’s the least worst of these cloud services to register for.

Connecting the Z1 hardware to the Tuya app

After you are able to login the app, you can register the gateway. Put the gateway in the power socket, make sure that it is in pairing mode and add it to the Smart Life app and your WiFi network. For the latter it is important to know that the gateway only supports 2.4 Ghz WiFi. For most WiFi access points this won’t be an issue because they operate on the 2.4 Ghz band by default. Adding a sensor is also quite easy: press and hold the reset button on the sensor for 5 seconds to go to pairing mode and run the add device tutorial in the Smart Life app. When the device is added to the Smart Life app, its signals take a detour through the Tuya platform. So the Zigbee device sends a message to the Zigbee gateway, the gateway converts it to an HTTP message to the Tuya platform. The Smart Life app is logged onto this platform and shows the message.

Using the Z1 Security Kit in the Smart Life app

When you have registered the gateway in the Smart Life app and added the sensors you are ready to go. Literally: you can access the gateway and sensors from anywhere through the Tuya platform. So regardless where you are, you have the following options:

  • Manage the devices and devices statuses: show state (e.g. door open/closed or temperature) and battery life.
  • Manage your homes, rooms and devices per room.
  • Connect devices with platforms like Alexa, Google Assistant, IFTTT.
  • Add automations, like controlling multiple devices through a single command or triggering an event based on output of a sensor.

Customizability

The kit runs on the Tuya platform and the gateway is Tuya compatible. This means add it to the Tuya network and that it can be connected to other Tuya compatible devices. For instance when the temperature sensor reaches a certain temperature, you can switch on a Tuya compatible lamp or start a Tuya compatible signal. The only limit is the maximum number of Zigbee devices: the gateway of the Alfawise Z1 support up to 32 devices.

We tried adding other Tuya compatible products, a door sensor and a lamp from the brand LSC (both Tuya powered over WiFi, no Zigbee). We were successful, but this did not went as smooth as we hoped. It was because we had to switch to access point pairing mode. Here you have to reset the device and connect your phone to the access point the device creates. This takes a bit of time, but the app guides you through. But this tells us more about the Tuya platform than it does about the Alfawise Zigbee gateway. Because the sensor uses WiFi it bypasses the Zigbee gateway and just uses the Tuya platform. You can use and combine it with the other (Zigbee) devices though.

Next we tried adding various Xiaomi Aqara sensors: a door sensor, motion sensors and a smart button. All devices communicate over Zigbee, but they are not Tuya certified. Unfortunately, I was not able to add the devices through the Smart Life app. The devices simply cannot be detected by the Smart Life app.

Home automation compatible?

Definitely, you can add this kit to your Smart Home system. For Home Assistant there is a Tuya integration available. You can use this to make the sensors available in your Home Assistant. For Domoticz there are also options, but a little less straightforward: as we already discussed in our Domoticz Community update of October 2019, in this forum thread you can find more information on the integration of Tuya in Domoticz.

Complementary Products / Alternatives

Alfawise Z1 vs Xiaomi Aqara

The main alternative of the Alfawise Z1 is clearly the Xiaomi Aqara Smart Gateway. Which option is best for you is in the details. Both gateways work using the Zigbee protocol. Obviously, the Aqara fits better in the Xiaomi Aqara ecosystem. This ecosystem has a large number of products it supports natively.

The Aqara Smart Gateway comes with a speaker and LED Light, the Alfawise Z1 gateway does not. The advantage of the Alfawise is that it is smaller and therefore will less stand out in your interior. Another key difference is that currently the Alfawise lacks Apple Homekit support. It only supports Google Assistant and Amazon Alexa, but the Aqara Smart Gateway supports all these features. Because the Alfawise is Tuya compatible, any developments on the platform will directly benefit the Alfawise Z1. So if Apple Homekit support is added to Tuya Smartlife, the Alfawise Smart Home sensors will work with it.

Alfawise sensors vs Aqara sensors

Another point to mention is that you can only buy sensors in a kit when you choose for the Alfawise. The company claims the sensors’ battery life is up to five years. This would mean that these sensors are way more efficient than the Aqara sensors, which have a battery life of only about two years.

  • Design
    (4.5)
  • Quality
    (5)
  • Usability
    (5)
  • Home-Automation compatibility
    (5)
  • Price
    (4)
4.7

Summary

The Alfawise Z1 is a Smart Home Security kit that comes with a set of sensors and a gateway to connect these to your smart phone. Both the sensors and the gateway are of good quality and well designed so they are as discrete as a sensor can be. Since all is Tuya compatible, they automatically benefit from the many features of this platform and the integration with Google Assistant, Amazon Alexa and off course or favorite smart home system Home Assistant. Whether the Alfawise is worth it depends on it’s current price on Gearbest. The biggest alternative is just buying the sensors and gateway from Xiaomi Aqara separately. You will lose a bit of convenience but the quality, integration options and price are similar. You should check the total price and consider which option is the best buy for you.

Pros

  • Good way to get started with a Zigbee network
  • Tuya compatible, so works with other Tuya devices and the Smart Life app.
  • Compatible with Amazon Alexa and Google Assistant

Cons

  • Not necessarily cheaper than Xiaomi Aqara equipment.
  • You need to register a Tuya account.
  • Gateway can only connect to 2.4 Ghz WiFi access points.
  • No support for Apple HomeKit

New Zigbee2MQTT version now supports Over-the-air (OTA) firmware updates!

0

The popularity of the Zigbee protocol keeps increasing. This has to do with a lot of new products that are Zigbee powered. But also, there are also many new brands that work with Zigbee and all is still offered at very competitive prices. The development of the platform goes rapidly and the number of contributing developers to zigbee2mqtt keeps increasing. We believe in the power of open-source, and therefore we love the zigbee2mqtt project. It’s cheap and fun to build a Zigbee2MQTT Gateway yourself, check our tutorial here. And now a new version is released that supports Over-the-air updating of the firmware of your Zigbee devices.


Zigbee 11.1 is out now!

You can find the releases and the complete changelog on github: https://github.com/Koenkk/zigbee2mqtt/releases

The newest release of Zigbee2MQTT has a lot of new features, supports lots of new devices and many bugs have been fixed.
But one of my favorite new feature is: OTA Firmware Updates. This means that you don’t need your original bridge to update your devices. At this time not every brand made their firmwares available. But Ikea bulbs are possible.

It will check automatically if a newer firmware is available.
A few new commands are possible:
– check newer firmware
– update firmware

Performing Zigbee OTA updates in Home Assistant

When you are Using Home Assistant you can use the add-on Zigbee2MqttAssistant which is a GUI for Zigbee2MQTT.
Every device can show an extra button at the end of the row in case an update is available for the device. This is shown below:

image 8

In MQTT explorer you can do the update as you can see in the screenshot below.
Enter the topic as I did, and place your friendly device name into the payload field.

MQTT explorer is a very good tool to watch and filter MQTT messages. Click on Zigbee2MQTT and filter on either the word ‘log’ or ‘update’, you will see the update status messages. Every procent is logged. After about ten minutes the device update is finished and your bulb will run the latest firmware.

image 9

Tips on using Zigbee2MQTT OTA

Some tips before updating your Zigbee devices Over-the-air via Zigbee2MQTT OTA:

  • Battery devices must be full before you start updating
  • Check and monitor your logs carefully when updating
  • Update one device at the time (for the sake of troubleshooting).

The official documentation from the makers can be found here: https://www.zigbee2mqtt.io/information/ota_updates.html

Build your own Universal Zigbee logic sensor by modifying a Xiaomi sensor

Sometimes you want to integrate some of the old technology into a smart home environment, but there is not the right sensor available. So why not build one yourself or modify an existing one into a DIY Zigbee logic sensor? That’s what happened to me a while back when I was looking for a way to monitor the doorbell. In some rooms it is not easy to hear and integration into an existing smart home environment offers some additional possibilities.
Since my devices mainly come from Xiaomi / Mijia, the sensor should of course fit (Zigbee output). A first try with a Mijia vibration sensor was OK, but not very reliable. Therefore, I have built a sensor, which I can switch directly to the AC voltage parallel to the bell and it reports the state to Mi Home. I think there are many other uses for this easy and cheap sensor.

Guest post by Volkmar L. (Antenne519)

What is needed?

  • Door/Window sensor from Xiaomi / Mijia (MCCGQ01LM)
  • Optocoupler, preferably with AC input e.g. a SHARP PC81411NTP (I purchased it very cheap at Pollin Elektronik)
  • a SMD resistor for current limiting (depending on the voltage and current requirements of the coupler, for example 10 KOhm)
  • Thin 2-core wire

Assembly of the DIY Zigbee Logic Sensor

The door sensor MCCGQ01LM has a reed contact, which is normally operated by the supplied magnet.

Total Time: 30 minutes

I installed an optocoupler parallel to this contact, which allows me to monitor any sources for ON / Off.

Conveniently, the MCCGQ01LM already has two pads at the appropriate location, which are connected to the reed contact. The optocoupler ensures potential separation.

First, open the sensor and remove the button cell. The circuit board can be easily removed (locking lugs).

After opening the sensor, the pads can be seen on the free space of the board. These are labeled GND (Ground / -) and D+.
Pic 1
Positive pole D+ marked in red

These pads are used to connect the output of the optocoupler (emitter GND, collector +).

A component in a DIL housing with “pins” could be plugged directly into the pads, with the SMD type I used, I have slightly modified the pins and connected them with small wires to the PCB. Pic 2

The optocoupler with the parallel to the circuit board bent terminals was fixed with a dab of glue.

You must be careful that the component does not protrude too far over the small sticker with QR code, otherwise the round support of the lid will find no place.
(Note the round impression of the foot, this space must remain free, so install the opto-coupler a bit at an angle.)

The two opposite pins are the input of the optocoupler. By using an AC model with 2 LEDs, the polarity does not matter later.

Since the SHARP PC81411 is also a “low power” model, it needs very little current to trip. With an input level of 9..12V AC to be monitored I have therefore chosen a 10 KOhm resistor to limit the current and soldered it directly to one of the pins.
However, the input voltage should not exceed about 48..60V, otherwise you must better isolate everything and choose a resistor capable for a higher voltage.
A 2-core cable leads the input out of the housing through a drilled hole.
Pic 3

The finished sensor can now be put back together, the battery is inserted and the lid closed.

The cable can then be fit with a plug or soldered directly to the source. The modified unit can still be used as originally intended (operated by the magnet) because the reed contact is still in place and will work as before the mod.
Universal Zigbee Logic Sensor

Results / Conclusion

Due to the built-in resistor, the Zigbee logic sensor can be directly connected to the doorbell (about 9V AC). When a voltage is applied (someone operates the bell) the opto-coupler turns the sensor on and it can e.g. send the signal to a Mijia Gateway as a ringtone or report it to your smartphone. The Mi Home app also creates logs about the switching process.
I have used the Xiaomi / Mijia door contact sensor (MCCGQ01LM) as it is compatible with probably all Mijia gateways (and is also included in the Xiaomi sensor kit sold in Europe)
The comparable sensor from Aqara may also be suitable. Since the door contact sensor used is very cheap and uses the Zigbee protocol, I could imagine that there are a variety of other uses for my modified version. Whenever a logic level (voltage on / off) is to be monitored, it is applicable.

Next project planned: Connect the DIY sensor to a 230V AC 20A current sensor module to monitor the washing machine…

This is a guest post by Volkmar L (nickname Antenne519). He approached us about sharing this project with the community and we are very glad he wanted to share his experiences with us. Thank you very much for this contribution! If you also want to share an interesting home automation project with us, feel free to drop us a message.

Zigbee2MQTT 1.7: New minor version with new major features!

0

As you know we love the zigbee2mqtt project. Great news for everyone who wants to be in control of all the Zigbee powered devices in their home by using Zigbee2MQTT! A new version has just been released. But don’t overlook this release, because version 1.7 is a minor update with some major changes. A lot of Fixes, a bunch of new supported devices and two new supported boards (which are better than the much cheaper CC2531). If you are running the Hassio.io Addon the update is already available. Please continue reading to know what’s changed and why we are so happy with the work of Koen Kanters and all the others who put in a lot of effort in Zigbee2MQTT 1.7.

Changelog of Zigbee2MQTT 1.7

The changelog is quite impressive!

  • Once upgraded from 1.6.0 to 1.7.0 you cannot switch back to 1.6.0 when not having a backup of the  database.db !
  • Zigbee2MQTT 1.7 has fully been refactored from zigbee-shepherd to the new zigbee-herdsman, among many other things, it improves:
    • Pairing of devices, especially Xiaomi battery powered ones.
    • Logging, it is now much clearer when a devices connects and pairs successfully
    • Speed and stability
    • For more, read #1888
  • The new CC26X2R1 and CC1352P-2 are now officially supported, these 2 adapters are a powerful alternative to the CC2530/CC2531 which can become unstable in larger networks. For more info read Supported adapters
  • For Docker users: Zigbee2MQTT switched to manifest listed images, user that are currently using the  arm32v6  or  arm64v8  should switch to the  latest  tag. Fore more info read Docker.

Features

Improvements

  • Make force remove explicit (documentation)
  • #2020 More properties for Coordinator
  • #592 Improved Livolo compatibility
  • Verify  configuration.yaml  schema on startup
  • Logging layout
  • #1876 Don’t allow duplicate friendly_name
  • #764 Publish state change for group members when group changes it’s state (documentation)
  • Publish  color_temp  when setting  xy  and  xy  when setting  color_temp  when device (bulb) supports it.
  • #641 Xiaomi MFKZQ01LM Mi/Aqara smart home cube add  side  for  flip90  event
  • #675 Improved IKEA ICTC-G-1 TRADFRI wireless dimmer integration
  • #671 Support power readings and state changes via button for Iris 3210-L Smart plug
  • #2124 Improve Eurotronic SPZB0001 Spirit Zigbee wireless heater thermostat integration
  • #2156 Improve support for MCT-340 E, MCT-340 SMA, XHS2-SE
  • #2122 Poll Hue bulb brightness when changed via Hue dimmer switch or IKEA TRADFRI remote control when reporting feature is used
  • #2256 Add device name to “failed to ping” message
  • #2113 Xiaomi JTYJ-GD-01LM/BW MiJia Honeywell smoke detector support selftest, sensitivity and smoke density (documentation)

Fixes

  • #2017 Fix devices dropping from network
  • #2059 Fix IKEA E1743 TRADFRI ON/OFF switch controlling Xiaomi ZNCZ02LM Mi power plug ZigBee
  • #1965 device_group_add/remove log format not correct
  • #1967 Xiaomi SJCGQ11LM Water Sensor – False Positives
  • #2033 Don’t publish cached states when  cache_state  is disabled
  • #2052 Docker Timezone not working
  • #897 Prevent  SML001  red LED blinking on motion detection
  • #1731 #1711 Fixed integration of various Gledopto bulbs and LED controllers
  • #2071 Read-only configuration file
  • #2094 Missing climate entity for Eurotronic SPZB0001
  • #1810 Brightness not applied for IKEA TRADFRI bulbs when setting both color temperature and brightness.
  • #2233 Salus SP600 power measurement under-read by factor of 10
  • #2250 Subscribe to nested topics for bind
  • #2220 Presence of  transition  parameter influences brightness in ON and OFF command

The new supported devices list is too long to show here!

original source: https://github.com/Koenkk/zigbee2mqtt/releases

The things I like the most

  • #2113 Xiaomi JTYJ-GD-01LM/BW MiJia Honeywell smoke detector support selftest, sensitivity and smoke density (documentation).
  • zigbee2mqtt/bridge/config/remove improved
  • new adapters! (Gonna test them instead of my cc2531)
  • better pairing and logging

https://www.zigbee2mqtt.io/information/supported_adapters.html for more info.

Difference between the two new added boards:

The new supported SOC boards have some improvements over the use of the CC2531.
– No debugger and flasher needed, it’s built in.
– Support the Zigbee 3.0 protocol.
– More powerfull and a better range.

On the github of Zigbee2MQTT I found the differences explained by james-fry  to help making the decision. the whole thread can be found here.

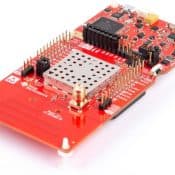
LAUNCHXL-CC1352P-2:

  • 👍 Has a built in PA/LNA for potentially better range (assuming Z2M will support enablement – enhancement is raised). RF design includes shield.
  • 👍 Has a built in SMA antenna connector (although its necessary to de/re-solder a tiny SMD capacitor to switch from PCB antenna to SMA. Should provide increase in range.
  • 👍 Can support sub 1GHz – opening the possibility for 868MHz (EU) and 915MHz (NA) zigbee for better range (technically possible but no idea how many end devices support it) and possibly other applications in the future… IMO this “benefit” should not be a consideration at the point.
  • 👎 Bigger PCB (~2cm) than the CC26X2R1
  • 👎 A little ($10) more expensive than the CC26X2R1
  • There are two versions with different RF suitability – The P-2 version favours 2.4GHz rather than sub 1GHz and this would be the recommended version to obtain for Z2M
  • 👍 STL for 3D printed case here: https://www.thingiverse.com/thing:3928171

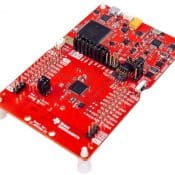
LAUNCHXL-CC26X2R1:

  • 👍 Slightly smaller PCB than the CC1352P
  • 👍 A little cheaper than the CC1352P and more sellers than just TI.
  • 👍 There is a STL for 3D printed case: https://www.thingiverse.com/thing:3305478
  • 👍 Another STL for 3D printed case here: https://www.thingiverse.com/thing:3928171
  • 👎 Theoretically less range than CC1352P due to lack of RF frontend
  • 👎 Possibility to use external antenna (with move of the tiny SMD capacitor) but the required JSC-SMA antenna adaptor is not cheap (~20 euros)
  • 👎 No support for sub-1GHz but there is no clear advantage of this currently

Conclusion on Zigbee2MQTT 1.7 update

So if you are running a Docker container or have Zigbee2MQTT installed manually, we recommend that you update to Zigbee2MQTT 1.7 right away.

If you are running the Hassio Addon from Daniel Welch you need to have a little patience. Keep an eye on https://github.com/danielwelch/hassio-zigbee2mqtt for an update.

Go to home assistant > Hass.io en see this:

image 4


For Domoticz watch: https://github.com/stas-demydiuk/domoticz-zigbee2mqtt-plugin

You can also check out our tutorial on how to get started with Zigbee2MQTT.

Xiaomi Mijia Aqara G2 Camera and Zigbee Gateway

IP cameras are hot, very useful and currently much cheaper than they ever where before. The form factor becomes smaller but the specifications are become better, with stunning image quality both during the day and at night. Also the functionalities of the cheap cameras increase. The Xiaomi Mijia Aqara G2 is an interesting IP camera: on one hand it is a decent camera, but it also acts as a smart gateway for your Zigbee devices. This means that you, by using the Mi Home Application, can use this camera as gateway or gateway extender and extend the reach of your Zigbee network.

Specifications of the Aqara G2

  • AI image recognition technology
  • Support two-way voice, smooth call without obstacles
  • Time-lapse shooting function, can automatically record the beautiful moments in life
  • 8m night vision distance
  • 140 degree wide angle, minimize monitoring dead angle
  • Input voltage: 5V / 1A
  • USB power cable: 2 meters
  Brand  Aqara(Xiaomi Ecological Chain)
  Model  G2 Gateway Smart IP Camera
  Resolution  1080P
  Lens  140° Ultra-wide Angle
  Dimension  82.4 x 56.5 x 50.5 mm
  Input  DC 5V / 1A
  Total Power  5W max
  Operating Temperature  -10℃ – 40℃
  Wireless Protocol  WIFI IEEE802.11b/g/n 2.4GHz, Zig.Bee
  Local Storage  Micro SD Card (Support CLASS 4 or above, 32GB max )

Expectations

I already own two Xiaomi cameras and a Zigbee gateway, so i know what at least to expect: A camera with nice specs, simple to use in the Mi Home App and a beautiful and simplistic design.

Packaging

Product weight: 0.1120 kg 
Package weight: 0.2160 kg 
Product size (L x W x H): 8.24 x 5.65 x 5.05 cm / 3.24 x 2.22 x 1.99 inches 
Package size (L x W x H): 11.70 x 9.10 x 8.40 cm / 4.61 x 3.58 x 3.31 inches

What’s in the box?

The content of the package:

  • The small Camera itself,
  • a Power Adapter,
  • an USB Power Cable,
  • Accessory Kit to mount,
  • And as we could expect from Xiaomi: a Chinese Manual

Features of the Xiaomi Mijia Aqara G2 Camera

The Xiaomi Aqara G2 smart camera has some amazing features to catch the eye of gadget lovers. Therefore, here are the top features:

  • Easy to install and use
  • AI image recognition technology
  • Smart home features due to the gateway function based on Zigbee 3.0
  • Long range of visibility even in the night
  • Auto uploading of videos to cloud storage
  • Create timelapse videos

Test

Installation is a simple process and similar as the installation of the dafang camera.

  • Open the Mi home app, click on the ‘+’ icon to add the camera.
  • Find and select the Aqara G2 camera.
  • Wait for the voice prompt in Chinese (don’t know what it says), and click next.
  • Then you get a QR code on your phone which you have to let see the camera to begin the installation.
  • You will hear another voice prompt, and the camera will then begin installing.
  • Give the Device a friendly name and choose the room where the camera is located.
  • That’s all. ready to stream!

Functions

Of course the camera has the same functionalities as the xiaofang and dafang. Live stream, recording etc. But unique to this camera is the possibilities to add Xiaomi Aqara smart devices, because it’s also a Zigbee gateway.

Another nice function is the time-lapse. You can activate time-lapse videos in the camera settings. The options you have are basic: start and end time, and repeat. By default the time-lapse videos are available in album management. Mi Home sends a push message to indicate that the video is finished and available to watch. The settings I miss are more advanced time-lapse settings, like specifying how much frames per time unit.

Besides the default storage option (recording to cloud) you are able to use your own SD card or record but it misses the option to record to a local NAS share.

Build Quality & Design

This camera stands on a little foot so it’s easy to mount it, but if you see this minion and the camera itself they are looking very similar. Was Xiaomi inspired by the minions?

Afbeeldingsresultaat voor minion

Usability

The Xiaomi Aqara G2 is a nice small devices with a strong magnet mounted on the base. The base can be attached on the surface of iron-containing objects. Therefore it is supporting a variety of installation methods, such as placing, wall attachment, where you want to put it.

Home automation compatible?

The Aqara G2 smart camera is not only a security camera, but also a smart home gateway based on Zigbee 3.0. So you can link sensors or other smart home devices and let them communicate with each other. For exemple shoot a photo when door opens, close the curtains as, you name it. It can all be done from the Mi-Home app.
And as you probably know from us, we like the mi home app, but we also want to include devices in our central smart home systems as Domoticz of Home assistant. And that is not possible in an easy way (for now).

Complementary Products / Alternatives

If you want a camera that is compatible with Mi Home, but also with Domoticz or Home Assistant, you can look into the camera’s below. They are flashable as you can read in our other articles (search on xiaofang or dafang on Gadget-freakz.com). But of course they don’t have the gateway possibilities.

Where to buy?

buy at Banggood
Thank you for the review sample.

How to improve your Zigbee network!

Almost everyone around me is switching to a Zigbee network now because of the price and features of great projects like Zigbee2mqtt. You build your own gateway and get rid of Ikea, Xiaomi, Philips boxes/gateways/hubs. Its cheap, reliable and fun to outsmart the vendors of proprietary gateways and build your own cc2531 router.

But some people have their doubts and question the range or the maximum devices paired to one router. Therefore we wrote this post. Some tips to improve the range and strength of your Zigbee network. And still it cost you almost nothing! So read learn, try and have fun!!

A zigbee network

Zigbee acts as a mesh network. And below you see how a typical Zigbee mesh network looks like.
There is always a single coordinator. If you pair some devices to it, you get a simple Star network. But when you have more end devices paired over a longer range, some devices will act as a router. That means that a signal for end-devices hops through this router to the coordinator. Or a signal can even use more than one router to communicate with the coordinator. The more routers, the stronger the total network will become. Just like over the internet, an end device will always choose the best path to the coordinator.

ZigBee-network-topologies
Zigbee network

Coordinator

You always need at least one coordinator. It has router capabilities and is the start of your Zigbee network. This can be a proprietary gateway or your own DIY gateway.

Router

Routers transfer the traffic of end devices between the different nodes. They cannot be battery powered because a router they also have to be ready to transfer a message, which cannot be guaranteed when they are in power saving mode. AC powered devices like the Ikea smart switches are end devices that also have router capabilities.

End devices in a Zigbee network

Your switches sensors and devices, simple 🙂 Devices have one parent, and all communication is going through that parent. A parent can be a router or coordinator.

Maximum
A coordinator with the zigbee2mqtt supports 15 devices directly. BUT with extra routers this can be extended easily. When using the default coordinator firmware + 2 CC2531 routers your device limit will be:

  • Coordinator: 15 – 2 routers = 13
  • Router 1: 21
  • Router 2: 21
  • Device limit of 55 devices

The more routers (and remember that AC powered end-devices are acting also as routers) the better your network will be!

Use latest firmware

Always be up to date! Not only the software. The plugin/add-on but also the software on Zigbee transceiver, this called firmware.
Check our other article: How you can update your firmware. and use the latest firmware from:
https://github.com/Koenkk/Z-Stack-firmware/tree/master/coordinator

Zigbee2mqtt will output the installed firmware version to the zigbee2mqtt log on startup.

Extend the range of the cc2531

The range of the CC2531 (but also for other USB transceivers like rfxcom, zwave stick etc) can greatly be improved when connecting it with an USB extension cable instead of directly plugging it into your Raspberry Pi or computer.
When plugged directly in the computer, the CC2531 antenna suffers from interference of radio signals and electrical components of the computer. Also be sure not to position the CC2531 too close to any other radio transmitting devices (e.g. Wifi router). A USB extension cable of 50 cm is already enough to reduce the interference.

Create extra Zigbee routers

Improve the strenght of your Zigbee network by adding extra routers.
This can be end-devices like smart socket switches like those from Ikea for example. It can only act as a router when its connected through AC power.

How to create a dedicated CC2530 router?

Three cheap and simple little steps to achief a better range and stable Zigbee network.

  • Buy the right products (the links below go to the cheapest and reliable shops of AliExpress)
  • Flash the Zigbee firmware
  • And plug it in a charger / AC 220 socket.

What do you need to create a Zigbee router?

You can create a router from a cc2531 in a usb charger but you can also build a better range Zigbee router. A little bit more expensive but on 220 and a better range due to the antenna on the 2530 chip.

Flash the zigbee2mqtt firmware!

In our other zigbee2mqtt article we tell you how! Remember to flash the correct and latest firmware.
When Using a cc2531 you can use the default cable. but with an cc2530 you need the dupont wires. Check the pictures below for the diagrams to wire them correct.

CC debuggerCC2530
1GND
2VCC
3P2.2
4P2.1
7RST
9VCC


Put it in a box

When you bought the items above you can create this in a few minutes!

from zigbee2mqtt project

How to create a zigbee network graphic for Home Assistant?

A picture can tell us more then thousands words 🙂 So create a picture of your zigbee network.

User robin made a very nice component to display you zigbee network by image:

map

Important: you have to clear the browser cache after each update
Instructions

  1. Download or clone https://github.com/rgruebel/ha_zigbee2mqtt_networkmap 42
  2. Copy “custom_components/zigbee2mqtt_networkmap.py” to your “custom_components” folder.
  3. Copy the folder “www/zigbee2mqtt_networkmap” and content to your “www” folder.
  4. Add the following to your configuration.yaml. It is possible to update the map directly via button. If you want to use this functionality you also have to activate the webhook component webhook: zigbee2mqtt_networkmap: panel_iframe: networkmap: title: 'Zigbee Map' url: '/local/zigbee2mqtt_networkmap/map.html' icon: 'mdi:graphql' You can set the graphviz engine via URL Parameter:
    map.html?engine=circo (Default: dot, Supported Engines 7)
  5. Restart Homeassistant
  6. Call the service “zigbee2mqtt_networkmap.update”
  7. Test if everything is working

We thank robin for his work. more info at his topic: https://community.home-assistant.io/t/zigbee2mqtt-show-the-networkmap-in-home-assistant/

Other articles about zigbee

zigbee in home assistant

Zigbee network

zigbee2mqtt in Domoticz

Check our shop page for a collection of zigbee products that are compatible with zigbee2mqtt, domoticz and home assistant.

Zigbee2MQTT in Home Assistant

This is a spin off from the Domoticz Zigbee article, to build and integrate your Zigbee Gateway into Home Assistant requires a slightly different approach, but some of the steps are similar.

Since version 0.86, Home Assistant has a new feature: the Zigbee management console. This provides users the possibility to use there own Zigbee dongle/card and due to the native implementation the functions are the same. Actually like the native Z-wave implementation. So you can now easily manage your Zigbee network and perform basic things like: Permit and Remove operations, configure nodes etc. But later this year more features will be added.

zha
Screenshot from Zigbee Management Console in Home assistant

Lots of folks already have some smart hardware from brands like Hue, Ikea or Xiaomi. And every brand has its own separate bridge or gateway. They are all using the Zigbee protocol. There are some dongles available that can communicate with several brands, but the downside of some of them is that they are not really open-source, or not that cheap or not plug and play. We think the native implementation in Home Assistant is going to change this.
Because the feature is in an early stage, still a lot of work needs to be done. But that Zigbee is growing is a fact, every platform is busy with it and the sticks are often low on stock because of the growing popularity.

What about Zigbee2mqtt in Home Assistant?

Background

You probably heard of the Zigbee2mqtt addon. This is an Open Source developer started by Koen Kanters (Koenkk). Zigbee2mqtt takes another approach. It’s free software, totally open-source and the software you can upload (flash) is on very cheap hardware.
It aims to develop a Zigbee to MQTT bridge, so you only need a single Zigbee gateway. That means that it is not running in the native Home Assistant Zigbee implementation yet, but that is not a problem because the community of zigbee2mqtt, the documentation and the add-on are really good.

So why should we care about this project?

This project contains very good documentation and has great potential. In a few steps, you are able to get rid of the popular Xiaomi gateway that sends your data to China. With low cost hardware, you can create an open source gateway that is usable for systems like Domoticz of Home Assistant.
A pro is that it’s cheap, fun, and due too the automatically MQTT discovery close to the native implementation. Another advantage is that it’s easy to switch and test another smart home platform like Domoticz, because it runs as a separate instance. This is also a downside, because there needs to be a seperate MQTT broker running.
But maybe later this year you can use your flashed gateway and use it with the native implementation. Who knows.


Getting started with Zigbee2mqtt

To create your own Zigbee Gateway There are multiple options; different types of hardware, flashing modes and besides a Raspberry Pi, you can run the software in a separate Docker Container. Our favorite method: Flashing the hardware on windows and running the software on a Raspberry PI with Hassio on it. And for Hassio there is an add on for it, so when you are looking for a easy way, this is it!
If you are in need of other ways you can read the information on the wiki of the zigbee2mqtt project.

3 Easy steps to get rid of your gateways and bridges:


1: Buy the hardware
2: Preparing the hardware
3: Install the software

Buy the right hardware

You only need the CC debugger and the downloader cable once to flash the firmware on the USB sniffer so it can operate as a Zigbee gateway.  But its handy to keep so you can create more gateways in the future. Or you can buy it together with your friends and share the debugger and downloader cable to save some money. 😉

No coupons found.

Prepare Hardware (Flashing)

There are several ways to flash the sniffer. This is described very well on the getting started page of the zigbee2mqtt wiki. We followed the instructions for Windows and Linux and you can choose which you prefer the most.

Linux (Raspberry Pi)

Connect the CC2531 USB to your Raspberry Pi

[cc lang=”bash” escaped=”true” width=”90%” noborder=”1″] ls -l /dev/ttyACM0 git clone https://github.com/dashesy/cc-tool.git cd cc-tool ./configure make –Download the firmware wget https://raw.githubusercontent.com/Koenkk/Z-Stack-firmware/master/coordinator/CC2531/bin/CC2531ZNP-Prod.hex –or: curl https://raw.githubusercontent.com/Koenkk/Z-Stack-firmware/master/coordinator/CC2531/bin/CC2531ZNP-Prod.hex -o CC2531ZNP-Prod.hexsudo ./cc-tool -e -w CC2531ZNP-Prod.hex[/cc]

Windows

We bundled the prerequisites for Windows with:
Flasher software, driver and firmware in 1 zip. Download HERE.

  1. Install SmartRF Flash programmer.
  2. Install the CC debugger driver. 
    1. When I used the setup the installation was not correct, and manually pointing to the drivers was needed. See the screenshots below.
  3. Connect the debugger with the Downloader cable to the cc2531 USB Sniffer.
  4. Connect both USB (from debugger and Sniffer) the same time.
  5. If the light on the CC debugger is RED, press set reset button on the CC debugger. The light on the CC debugger should now turn GREEN.
  6. Start SmartRF Flash Programmer, setup as shown below and click “Perform actions” . 
debugger and sniffer connected

Put the USB Sniffer in a nice case

When the sniffer is flashed you can put it on your Raspberry, but a PCB with a USB connector is not that fancy. So when I searched on thingiverse I found a nice design (link to 3d model) that I printed.

Install the (Zigbee gateway / bridge) software (Hassio Zigbee addon)

Total Time: 5 hours

Put the stick into the raspberry

Go to: Hassio> Add-on store and Add the repository URL : https://github.com/danielwelch/hassio-zigbee2mqtt

The repository contains two add-ons:

zigbee2mqtt and zigbee2mqtt-edge (a stable and a beta version) We choose stable. It can updated by hassio. When new things addes in the edge version and the are tested well, it will be included in stable. A little bit later but rock solid stable 🙂

Configure zigbee2mqtt addon

You need to setup a mqtt server like mosquitto of use the buildt-in mqtt option. I installed mosquitto from the hass.io add-on store.

The addon can be configured in the website.
Hass.io > Under Dashboard you can click on ‘zigbee2mqtt ‘
here you can start, check logs, update and change your settings.
This are the settings:

{
  "data_path": "/share/zigbee2mqtt",
  "homeassistant": true,
  "permit_join": true,
  "mqtt_base_topic": "zigbee2mqtt",
  "mqtt_server": "mqtt://homeassistant",
  "serial_port": "/dev/ttyACM0",
  "devices": [],
  "network_key": [],
  "mqtt_user": "your mqtt Username",
  "mqtt_pass": "your mqtt password",
  "disable_led": true
}

permit: it’s better so set it on true when adding new devices, otherwise set it back to false.
mqtt_server: change this if you are running a server with another name otherwise leave it default
serial_port: In hass.io go to: hass.io > system > hardware. Under serial you see the USB devices connected, use the right one and check the logs to find out if you are doing right.
username and password: needs to be changed by the one you are using.
The cc2530 has a led on it, here you can enable/disable if you like.

After making changes restart the plugin and check the log lines at the bottom of the page for messages or errors.

Finished

At this point, you are actually running a Zigbee gateway.  
Now you are able to pair devices with zigbee2mqtt, but it’s in MQTT and not yet in your home-automation software. Learn how to pair. When you have it working all right you can check the integrations of home-assistant and see mqtt.
after that you can pair and the new devices would appear here,

Configure from gui/dashboard

If you like to change the options from the dashboard instead of changing configuration text in the plugin, like the screenshot below:
Add into the code into your configuration.yaml or include a seperate file from: https://gist.github.com/ciotlosm/59d160ad49c695a801d9a940a2a387d2

40874668 bdd1645a 667a 11e8 88ff 03b78212910b

Zigbee map

User robin made a very nice component to display you zigbee network by image:

map

Important: you have to clear the browser cache after each update
Instructions

  1. Download or clone https://github.com/rgruebel/ha_zigbee2mqtt_networkmap 42
  2. Copy “custom_components/zigbee2mqtt_networkmap.py” to your “custom_components” folder.
  3. Copy the folder “www/zigbee2mqtt_networkmap” and content to your “www” folder.
  4. Add the following to your configuration.yaml. It is possible to update the map directly via button. If you want to use this functionality you also have to activate the webhook component webhook: zigbee2mqtt_networkmap: panel_iframe: networkmap: title: 'Zigbee Map' url: '/local/zigbee2mqtt_networkmap/map.html' icon: 'mdi:graphql' You can set the graphviz engine via URL Parameter:
    map.html?engine=circo (Default: dot, Supported Engines 7)
  5. Restart Homeassistant
  6. Call the service “zigbee2mqtt_networkmap.update”
  7. Test if everything is working

We thank robin for his work. more info at his topic: https://community.home-assistant.io/t/zigbee2mqtt-show-the-networkmap-in-home-assistant/

Updating the Add-on and zigbee2mqtt Library

The stable, versioned zigbee2mqtt can be updated using the standard Hass.io update functionality within the user interface. This add-on will be updated with bug fixes and as the underlying zigbee2mqtt library is updated.

Thanks to

koenkk and all contributors for mqtt2zigbee project


Discount coupons

No coupons found.