Drones are hot! Not only flying a drone for a hobby is very fun, but are also able to take pictures and shoot video from angles that are unreachable without a drone. So sufficient reasons to start looking for a drone. There are plenty of cheap drones available, but these often come with limitations regarding flight time and features. So, buying your first serious drone can be a project. Most people will not buy such a drone in an impulse, and will even closely consider to buy the drones in the price range of a Mavic. But if you want better features than a basic drone, you can spend a little over 150 euro to buy a racing drone. But is this a good choice for a first serious drone? We are testing the Eachine Wizard X220 FPV Racing Drone to find this out.
Contents
Specifications (a lot)
Basically every part of the Eachine Wizard X220 FPV is a standard drone drone part. This means it can be easily replaced, extended or upgraded. The specs of the parts as stated at banggood are:
Eachine Wizard X220 (Overall)
- Wheelbase: 220mm
- GMachine arm: 4mm carbon fiber
- Flying times: 12 minutes
- Weigh: 484g (with battery)
- Take off weigh: 535g
- Package size: 440 x 300 x 100mm
- Package weigh: 1325g

Eachine MN2205 2300KV Motor
- KV : 2300
- MAX thrust: 780g
- Length: 32.2mm
- NO.OF cell : 2-4S
- Diameter : 27.9mm
- Framework : 12N14P
- Shaft : 5mm
- Propeller : 5 inch
- Weight: 25g
Eachine 20A BLHELI_S ESC
- Item name : 20A BLHELI_S ESC
- Con.Current : 20A
- Peak Current(10s) : 25A
- Input Voltage : 2-4S
- BEC : No
- Programming : YES
- Firmware : Blheli_S
- Weight :7.9g
- Size(PCB) : 27*12mm
700TVL Camera
- Power supply : 3.6-5.5V (powered off TX)
- Power consumption : 60mA @5V
- Imager : 1/3” CMOS, 700TVL
- Angle : 127° diagonal FOV, 110° horizontal FOV
- FPV tuned light handling
- System : PAL
- Lens : 2.8mm IR coated
- FOV : 127°diagonal 110°horizontal (ideal for fixed camera)
- Operation temperature : -20 to 70°C
- Square : 29 X 29 X 23.5mm
- Lens extrude (LxDia) : 15mm X 14mm
- Weight : 12g
5.8G 200mw 40ch Transmitter
- Modulate : Wideband FM Modulate
- Video Format : NTSC/PAL
- Output Impedance : 50 Ohm
- Output Power : 23-24dBm
- Channel: 40 CH
- Operating Voltage : 7V-24V
- Supply Current : 190mA
- Operating Temperature : -10~85℃
- Video Band Width : 0~8.0 MHz
- Audio Carrier Frequency : 6.5 MHz
- Video Input Level : 0.8~1.2 Vp-p
- Video Input Impedance : 75 Ohm
- Audio Input Level : 0.5~2.0 Vp-p
- Audio Input Impedance : 10K Ohm
- Connector: RP-SMA Female (Inner needle)
- Antenna Connector: RP-SMA Male (Inner hole)
- Dimension: 40mm x 23mm x 8mm
- Weight: 7.3g
Flight controller
- F3 6DOF, betaflight 2.9.1 version
FlySky I6 2.4G 6CH remote control
Channels : 6 ChannelsModel type : Glider/Heli/AirplaneRF range : 2.40-2.48GHzBandwidth : 500KHzBand : 142RF power : less than 20dBm2.4ghz system : AFHDS 2A and AFHDSCode type : GFSKSensitivity : 1024Low voltage warning : less than 4.2VDSC port : PS2; Output:PPMCharger port : NoANT length : 26mm*2 (dual antenna)Weight : 392gPower : 6V 1.5AA*4Display mode : Transflective STN positive type, 128*64 dot matrix VA73*39mm, white backlight.Size : 174x89x190mmOn-line update : yesColor : BlackCertificate : CE0678, FCCModel memories : 20Control range: 500m
Flysky 2.4G 6CH FS-iA6B Receiver
Channel: 6
Frequency Range: 2.4055–2.475GHZ
Band Width Number: 140
Transmitting Power: ≤ 20dBm
RF Receiver Sensitivity: -105dbm
2.4G Mode: The second generation of an enhanced version f The automatic FM digital system
Encoding: GFSK
Antenna Length: 26mm * 2 (dual antenna)
Input Power: 4.0-6.5V DC
Dimension: 47 x 26.2 x 15mm
Weight: 14.9g
Color: Black
i-Bus Interface: Yes
Data Acquisition Interface: Yes
Model Type: Airplane / Glider / Helicopter
Compatible Transmitter: Compatible with FS-i4,FS-i6,FS-i10,FS-GT2E,FS-GT2G
Battery
- Capacity(mAh) : 1500
- Cells (s): 3
- Weight (g): 120
- Length(mm): 89
- Width(mm): 19
- Height(mm): 35
- Connector: XT60

Expectations
The prise of the Eachine Wizard x220 is a lot cheaper then a fimi or a mavic. But they serve a different purpose. the wizard is for racing, tuning (with software, or soldering) and the others are for newbies that want a easy to control drone that is complete and taking 4k videos. Therefore I think it would be much harder to learn fly, I would crash a few times and I need to learn the different racedrone specific language if I want to tune the software. Sounds like a lot of fun!
Packaging
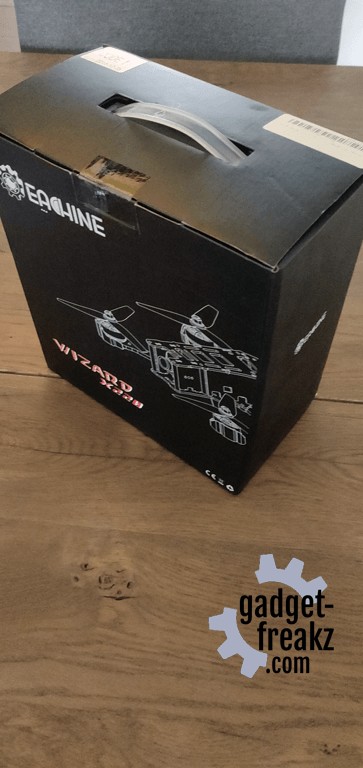
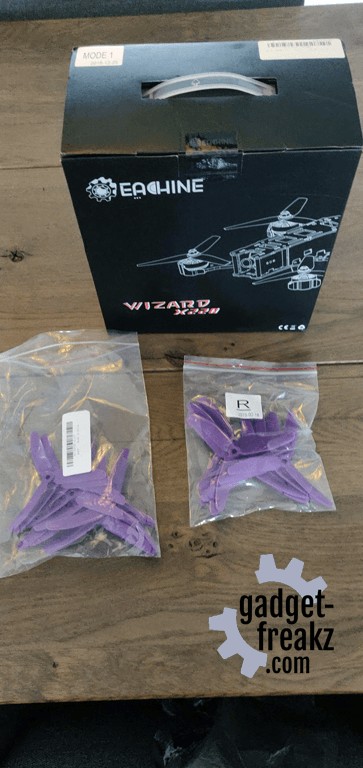
It’s one box and a bag with blades, so I think we need the blades 😛
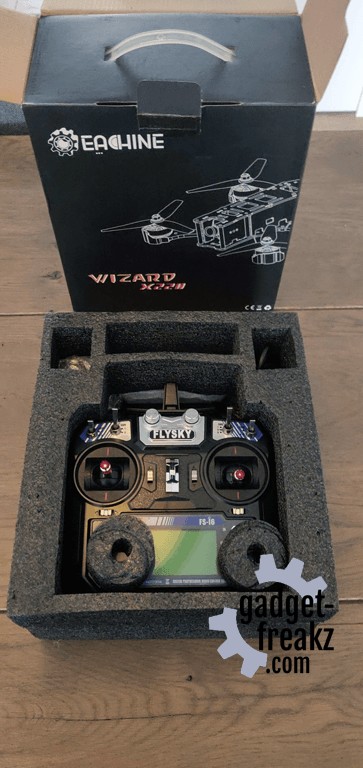
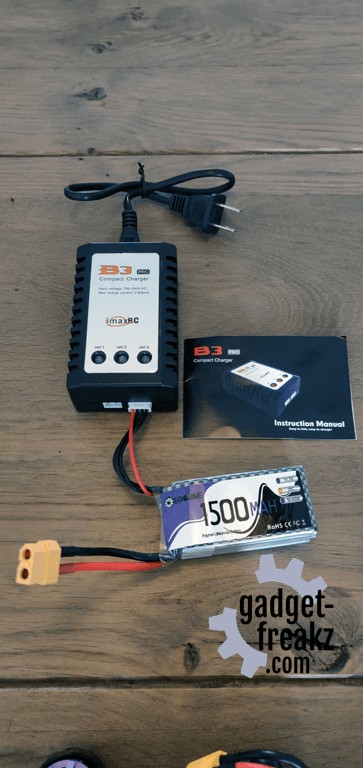
What’s in the box?
- The Eachine Wizard X220 itself
- Flysky I6 2.4G 6CH remote control
- Flysky iA6B receiver
- 2 x 2205 2300KV motor CW
- 2 x 2205 2300KV motor CCW
- 4 x Eachine 20A BLHELI_S ESC
- 10 x Kingkong 5040 3-blade propeller purple CW
- 10 x Kingkong 5040 3-blade propeller purple CCW
- F3 6DOF flight controller
- 700TVL camera
- 5.8G 40CH 200mw transmitter
- 3S 11.1V 1500mah 25C XT60 battery
- B3 charger
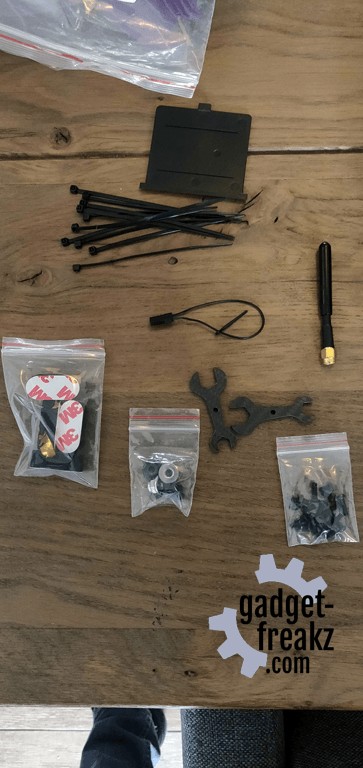
- Antenna
- Battery strap
- 2 Wrenches
Features of the Wizard x220
- Compatible with max 5 inch propeller
- Compatible with 2206, 2208 motor
- Can be used with 4S/3S battery
- With Seft-protection function
- With direction indicator LED
- Inclined motor base design, fast speed
- Removable protection motor base
Start the drone adventure
There was no instruction manual in the box. On the Banggood page there was a link to a very small instruction manual. But luckily for us this is not a very new model and in the time the product is on the market lots of video’s and instructions are available. We read and watched lot of video’s and some are not correct anymore. so when you search pay attention to the publication dates!
Before we flight we had to do a few thinks.
- Charge the battery of course
- Update the software
- Binding the remote transceiver
- Optional: Print a few things to extend the drone: Action cam mounting, extra protection.
- fix the blades (propellers)
- Easy as it is. charge, you can’t do this wrong. I only needed a other cable or a converter because the connector is not Dutch (european).
- Updating the software can be done with a micro USB cable to the computer. Lots of videos are showing instructions to unlock, solder etc. But with this version that wasn’t needed. Just a simple data USB cable (not only a charging cable) from drone to computer and software. The software is Betaflight configurator. with this software you can update and adjust the drone settings.
download: https://github.com/betaflight/betaflight-configurator/releases - Binding is very easy, press the button on the transceiver. and press binding key on the remote while poweron the remote. The only thing was that we need to open the drone to press this tiny button! There are 2 boards with a tiny button in the middle (you cannot reach this, and in the back. The back module is for a FPV goggles and not for the remote!
- Check Customizability below
- Mount the blades. And do this very tight. maybe it’s a little hard but due to the speed of rotations and the crashes you probably make they become loose very short. So maybe it’s and idea to pick up a electric drill to help with this job.
- 6: Fly, play, learn crash and crash again 🙂 It is not that easy to fly but it’s fun, very fast and nice to learn.
Build Quality & Design
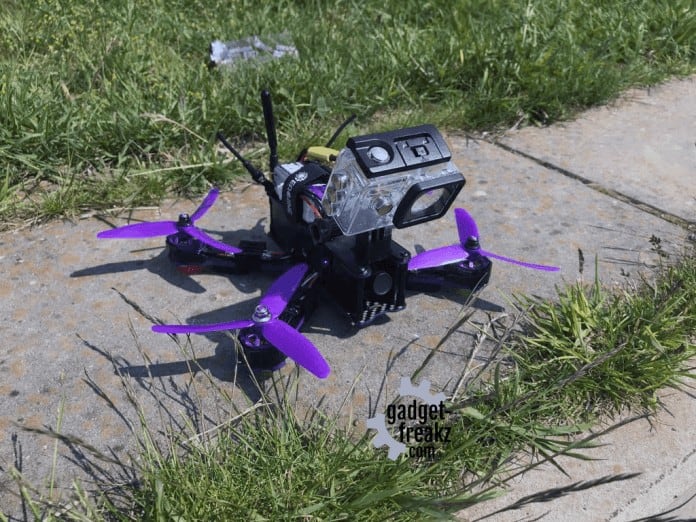
The Drone uses a carbon fiber x frame and uses components with a good quality. The drone came preassembled and every screw was good tightened. The fact that is not a foldable “normal” drone looks are less important, the drone looks as a combination of industrial and DIY. But the drone is well designed, everything is on place but can easily be replaced when needed. The only real downside are the blades, so are cheap and made of hard plastic, With the speeds this drone can achieve a crash is in inevitable, that the reason they deliverd lots of extra blades. A good thing is that you can easily replace other blades.
Customizability
When you have an 3d printer there are a lot of models to download and print so you can extend your printer.
A few sample:
Mounting for your actioncam
Antenna mount
landing gear
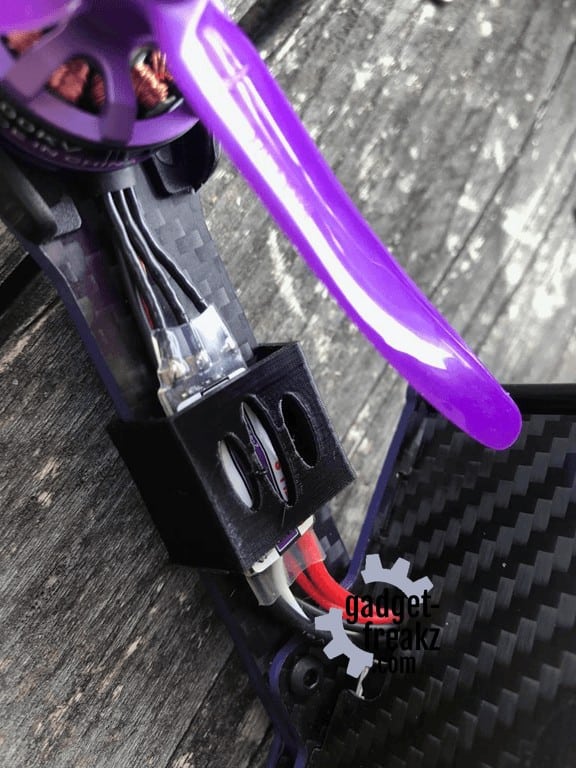
protection for the ecs’s on the arms.
Complementary Products / Alternatives
pro / cons
pros
- Affordable
- Complete
- Strong carbon fiber frame
- Extendable
cons
- No screwdriver included.
- The X220 come pre assembled but you need to open it because of binding the remote.
- It can be hard to learn flying!
Price quality and verdict
The X220 needs to be a well-considered choice, because the learning curve is very steep. You need to invest some serious time to get to know your drone and to practice to get the hang of it and being able to focus on shooting photos and videos. There are no safety nets, like return to base functions. When you decide to bite the bullet and get the drone under control, you get yourself a very good drone that is very responsive. Next to that, every component of the drone can be easily fine-tuned, customized and replaced. The device is compatible with the Betaflight flight control software, which is open source and the de facto standard for drones. On Thingiverse a large number of 3D print models are available to replace parts and extend this drone.
Where to buy the Eachine Wizard X220 FPV Racing Drone?

More information:
https://blog.dronetrest.com/wizard-x220-betaflight-update-and-initial-setup/
https://www.rcgroups.com/forums/showthread.php?2720753-Eachine-Wizard-X220-%28Under-construction%29
tips:
Review
-
Design
(4)
-
Quality
(4.5)
-
Usability
(3)
-
Price
(5)


