The air quality in your home is important for your health. There are a lot of products to improve it, starting with HEPA filters like the Alfawise P1 which we reviewed a while ago. To measure factors like temperature and humidity in your house there are lot of affordable options. To measure the other factors that determine air quality there are less products, and when you find them they are often more expensive. But there are options! In this article we will talk about a Do it Yourself Sensor based on the MH-Z19. We previously checked out the Xiaomi Mijia Air Quality Detector (model number KQJCY02QP). Now we will compare the Xiaomi Detector with our own DIY version. Before you can improve your indoor air quality you first have to measure thoroughly it and capture the different aspects. These factors can be PM2.5, T∨OC, COa and temperature. But if you are a nerd like me and love data to capture all possible data, this project can be interesting as well. ?
The picture below is from co2.earth and shows the part per million (ppm) that it is normal now. But as you can see, our co2 level is rising quite fast! But what’s normal? The Air Quality Meter should always display above the number below.

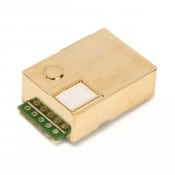
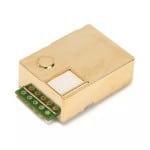
This is the MH-Z19 sensor. And don’t be fooled by it’s size: it’s really small but actually quite powerful.
Contents
DIY Air Quality Co2 meter based on MH-Z19 sensor
Before you read any further. the DIY means: Do It Yourself. This means that you need several products, solder them together and flash firmware to is. It’s cheaper than the xiaomi, but don’t have that nice design, it can be harder to get it working but on the other hand: fun to play and learn with it.
Whats needed to build your own CO2 meter?
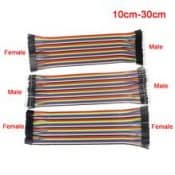
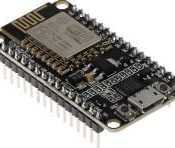
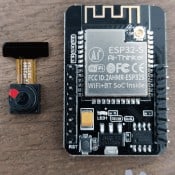
The products below. For the wires, choose male-female, but it’s always handy to have all the variants. For the controller, you can choose different products: Nodemcu, wemos etc. all with an esp chipset so they can be flashed.
Wiring the sensor to the controller.
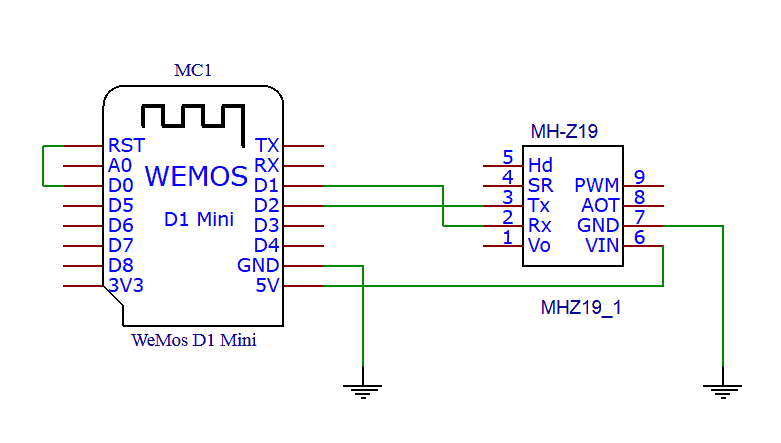
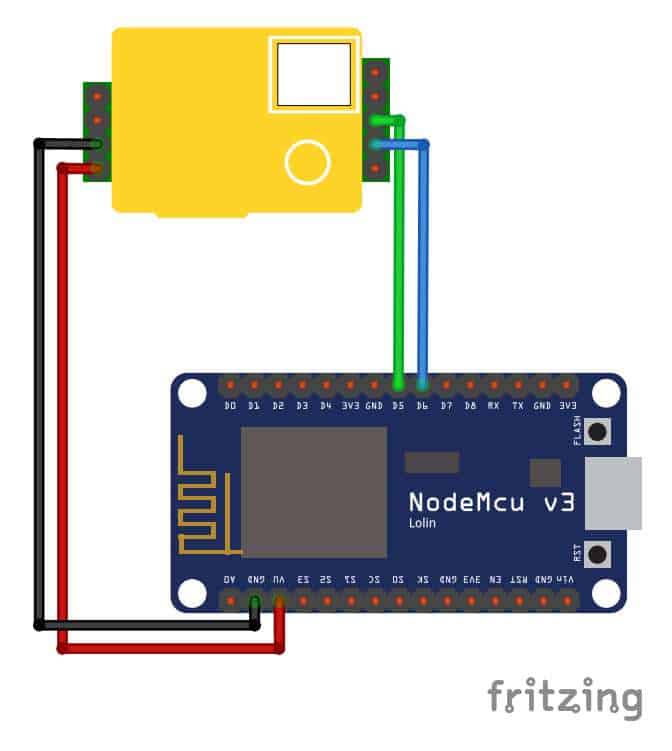
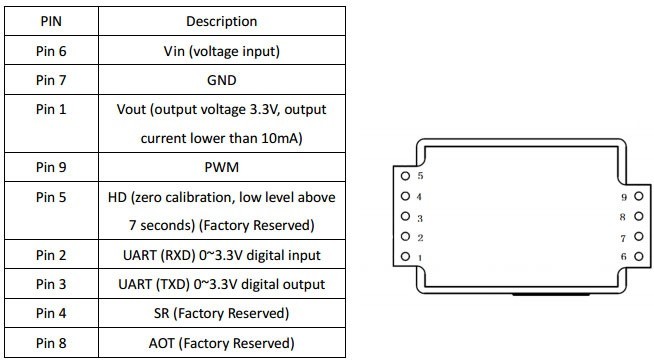
The sensor is really small but easy to solder if you get yourself male-female wires. Male side for the sensor and female on the wemos or nodemcu. The pictures below show how to wire.
The controller needs to be flashed with firmware that act as the controller, in order to get the data in Domoticz or Home Assistant. This would be covered in the chapter: DIY CO2 meter with MH-Z19 in your smart home.
Put it into a case
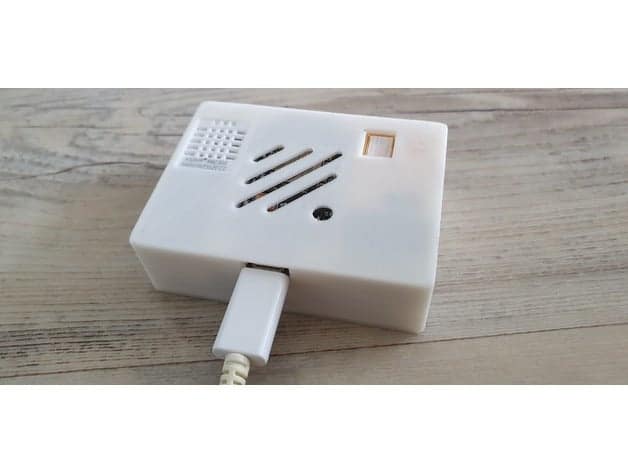
You need to put the controller wires and sensors into a casing to protect. You can buy a cheap one on aliexpress but maybe it’s nicer to print it yourself. On thingiverse there are several models to download and (let) print.
DIY CO2 meter with MH-Z19 in your smart home
There are several firmwares to flash and all have there own pros and cons. I would like to choose between ESPEasy and ESPHome. ESPEasy has is own web server with a nice interface and data can be pushed to several home automation platforms and in several ways. The most popular and modular these days is MQTT. I like ESPEasy when you are dealing with domoticz. But if you are using Home Assistant I can recommend ESPHome. Read on to find out why!
MH-Z19 into Home Assistant
You probably already uses an MQTT server in Home assistant and you can take that road with ESPEasy. But ESPHome is my favorite here! It’s integrated into Home assistant, it has several options like: pinging, restarting, ota flashing, a simple web server etc. and all from Home Assistant. Read more about it on https://esphomelib.com
Create ESPHome device for the Mh-Z19
Create an ESP Home sensor in Home Assistant
Total Time: 10 minutes
Your have already wired the MH-Z19 sensor
Install ESPHome
First install the ESPHome add-on by adding the repository:https://github.com/esphome/hassio
When added 3 versions of ESP home become available: Stable, Beta, Dev. We choose to install the Stable.
Make your Device code.
Go to ESPHome and click on the plus to paste the code below. Make sure you adjust the code below this steps to your own preferences. Rename the sensors, adjust the IP’s, We use a secret file to store passwords so adjust this to your situation.
Validate, compile and build the ESP Home Code.
When Ready validate the code.
If the code is correct you can compile & build.
When compiled download that build to your computer and upload it with ESPHome Flasher to your Nodemcu/wemos or other device.
Boot and check
If the sensor is booted, it become green in ESPHome screen. You can open the web server, check the logs or adjust the code. A great feature is that after modifying your code, you can press upload to update Over The Air. OTA.
Add integrations
go to settings>integrations and press +
choose the name you used for the esphome device and all the devices that you used in your code would be displayed here.
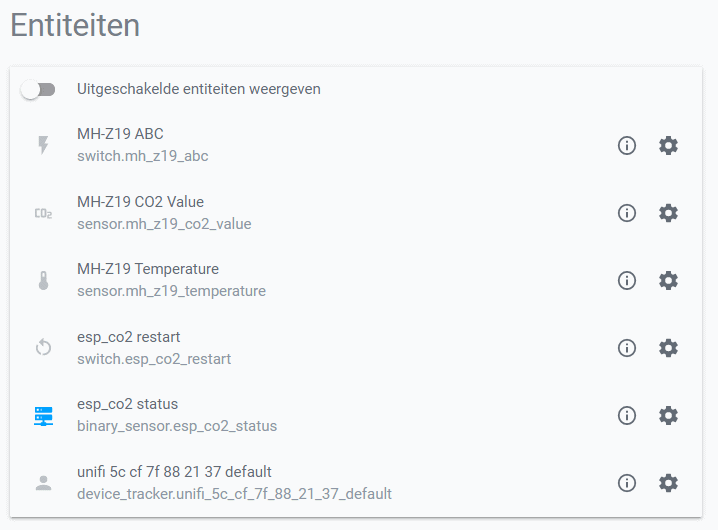
esphome:
  name: esp_co2
  platform: ESP8266
  board: nodemcuv2

substitutions:
  # Modify variables based on your settings
  hostname: 'esp_co2'

wifi:
  ssid: "Wlan"
  password: !secret esphome_password
  manual_ip:
    static_ip: 192.168.0.xx
    gateway: 192.168.0.1
    subnet: 255.255.255.0

# Enable Web
web_server:
  port: 80

# Enable logging
logger:
  level: DEBUG

# Enable Home Assistant API
api:
  password: !secret esphome_password
ota:
  safe_mode: True
  password: !secret esphome_password

uart:
  rx_pin: D0
  tx_pin: D1
  baud_rate: 9600

switch:
  - platform: template
    name: "MH-Z19 ABC"
    optimistic: true
    on_turn_on:
      - mhz19.abc_enable: mhz19sensor
    on_turn_off:
      - mhz19.abc_disable: mhz19sensor
  - platform: restart
    name: $hostname restart
sensor:
  - platform: mhz19
    co2:
      name: "MH-Z19 CO2 Value"
    temperature:
      name: "MH-Z19 Temperature"
    update_interval: 60s

binary_sensor:
  - platform: status
    name: $hostname status
MH-Z19 into Domoticz
ESPEasy is the easiest way if you are running Domoticz.
1: Flash the firmware
Download the latest version of ESP Easy from letscontrolit. ESP Easy can be found on this github page. Hook the esp8266/esp32 device als nodemcu of wemos to a computer. Then flash the firmware by using FlashESP8266.exe and choose your device/version. For more information about flashing ESP Easy check their wiki page.
2: Prepare Domoticz
Create virtual sensors hardware adding dummy hardware.
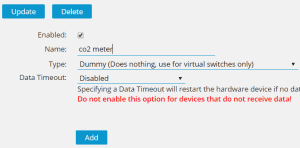

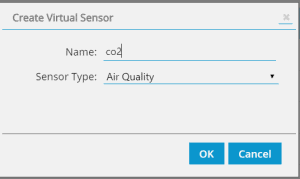

Go to settings > devices and here is the new created dummy sensor. note the idx (domoticz ID)
3: fix the settings in ESPEasy
Power the flashed device and enter the web server. In the browser by it’s ip. Under the controllers tab enter the details of your Domoticz installation. Go to devices then and add CO2 MH-Z19 sensor as a Device, give it a name and choose the pins you use. Send to controller has a IDX field, here you add the noted IDX from domoticz, which means the data of this sensor would be send to the virtual sensor in Domoticz.
Finished!!
Ideas
It’s nice to have the air quality data into your Home Automation platform. But that’s not the goal. But we want to do something with that data. What can be achieved with this data?
- Control your mechanical ventilation based on this data
- Control airco or purifiers
- Check presence of humans in the room
- Open windows automatically
- Alerts to change something
MH-Z19 sensor Versus Xiaomi Mijia Air Quality tester
| Product | Features | Overall | Price | Buy Now |
|---|---|---|---|---|
Xiaomi Mijia Air Quality Tester |
|
|
||
MH-Z19 0-5000PPM Infrared CO2 Sensor For CO2 Indoor Air Quality Monitor UART/PWM |
|
|
Conclusion
DIY Air Quality measuring
-
Design
(3)
-
Quality
(4)
-
Usability
(3.5)
-
Home-Automation compatibility
(4)
-
Price
(4.5)
Summary
An affordable sensor that measures CO2 and temperature. Nice for a DIY air quality solution. Read our article how to make a indoor Air quality solution for Domoticz and Home Assistant.
Pros
- small
- well documented
- accurate
- affordable
Cons
- you need to be a little handy
- you need a charger
- cost you some time and effort to make something cool.
We think that the Xiaomi Air Quality tester is an easier option for most of the readers. It has more sensors (humidity) and a nicer design with screen. But if you like to script, solder and learn: buy the components and do this DIY project instead of buying the Xiaomi. It is not only more fun, it’s also cheaper, more useful and actually quite easy.
Another pro is that you don’t need to obtain a token, and integration in your smart home system is easy. After all, it is your device and data and you decide how you will use it. Adding more sensors on the Nodemcu or Wemos is also an option.
Products
All products in this article with affiliate links to the shops. Check and click on the products photo for the links to different shops, and choose the most affordable.
